The Pixel Crush

-------------------------------------------|Digital Animation & Game Criticism|-------------------------------------------

Showing posts with label sculpting. Show all posts

Saturday, 19 October 2013

Crustacean

I've recently been working on my game modelling in my spare time, with hope of relevant work next year.
The brief: make crab tank, make painterly, make low poly.

Here is the concept, cribbed from cghub courtesy of one of Naughty Dog's concept artists.


While its quite lovely, it leaves a lot of the form of the tank to the imagination, relying on a strong silhouette to convey all it needs to.  Thats fine, until you have to figure out how it might work in three dimensions, so I took the concept into Photoshop and tried to create solid shapes from each of the different parts. Also there are some crab diagrams, never know when they might be useful.
That ultimately was not as useful an exercise as I had hoped and it turnout out the tried and trusted technique of blocking out the shapes in 3D was far more effective. From this blocky outline I was able to then begin adding more detail while retaining the proportions I had laid out.

This is the high poly (lots of faces on the geometry) mesh, I made a couple of mistakes here because I was too eager to get the things into Mudbox and start roughing it up in the sculpt phase. I should have gone in and refined the mesh, some of the unsubdivided meshes were too low poly. Another thing that would have been good to take into account would have been the distribution of edge loops, as I had only added them where needed- as you do when modelling for games, but Mudbox actually works much much better with evenly spaced faces so it can subdivide more cleanly.
But I went into Mudbox instead and added pitted surfaces, scratches, gouges, it was good fun.
Unfortunately I went to town and ended up creating a 7gb sculpt that no longer ran properly on my desktop, weirdly my laptop has twice the amount of RAM and Griffith saved the day, I was able to export all the AO and Normal maps from there.


Then began the texturing, I was trying to go for a cross between the texture style of Journey and the messiness of the original concept. These two styles are slightly at odds due to the clean gradients of Journey and the dirty oils of the concept.

Pretty pleased with how it was looking at this stage:
Maya render:
I then exported the whole thing into Unity. I recently bought the marmoset skyshop in a sale and used some of its image based lighting and shading techniques to creating a little scene with the crab tank in.

With a lot of luck you can actually walk around in that scene yourself using the webplayer below. W,A,S, D to move, mouse to look around.

Edit: Yeah screw that, you can download the folder here if you want to play


Saturday, 21 January 2012

Pixel Prolific

Previously on The Pixel Crush: "next week: sculpting!"

Sculpting!

I took Leonard's newly unwrapped torso and trousers and sculpted copious amounts of folds and detail into each, slightly forsaking the original concept design in the process. The amount of folds on his otherwise quite rigid clothing gives the impression of silk draped over cardboard but I don't really care because folds are awesome.

Sculpt Front
Though Dan did point out I went overboard on his glove to the point where they looked like medical gloves rather than gardening gloves so I went back in to the sculpt, added a seam, and flattened the palms for a more practical aesthetic.

Sculpt Back
For the first time I have been experimenting with normal maps, a fancy form of bump mapping or a flat form of displacement mapping depending on your outlook on life. Or a way of adding detail to a model using a multi-coloured textures for those reading who aren't animation students/professionals. (Imagine if there were professionals other than our tutors reading these blogs...hey professionals!)

In order to generate a normal map, a technique used widely in videogames incidentally, you first need to have a high res sculpt of your base model, there are then various ways of storing the data of the surface. The 'normal' is the direction the surface of the model faces when it comes to calculating lighting, reflections etc. Tangent normals look like this for Leonard's torso and are perhaps the easiest to get to work properly as far as I've found.
Tangent Normals
Object/world based normals look like this and are exceedingly pretty in a psychedelic way.
Object Based Normals
In order to get them to work properly in Maya they had to be 32bit for some reason, something I need to look into because the texture would be much smaller in 8bit meaning (much) faster render times. This polycount wiki is a great source of information on the subject.

Taking them into Maya I played around for a few hours trying to get them to look right before realising they needed to be 32bit in order to render properly without blowing out or breaking in certain areas. I was having problems with the object based normals where the UV seams met but using the 32bit format I switched to for the tangent normals probably would've fixed this.
Here's Leonard wearing his new garments.

Later I went back and sculpted the trousers too with their fancy interleaved ankle cuff things.
Leonard in his new outfit
I even tried a normal map on the face but the way the light scatters through his skin looks SO much more beautiful when its displaced properly that the plastic looking flatness of the normal map didn't work in the excellent way it does for his clothes. Here I've applied some really simple shaders just to test the specular properties of the clothing with the normal maps applied.
Plastic Face
Its all very smooth looking so next I began texturing using a lots of maps extracted from the Mudbox sculpt including ambient occlusion, displacement, and some photographs from my tiny collection of texture reference.
Ambient Occlusion Map
Using a really simple process of painting the base colour I wanted, then layering all the maps over the top and then adding a detail layer for cloth or dirt or leather I was able to create some textures I'm quite proud of. I often used the maps to mask out things like dirt so they were only in the cracks of things where Leonard couldn't clean them so easily. Blending modes between layers became really important as the standard way of applying ambient occlusion is using multiply but to get the skin and clothing looking natural you want to shadows to be shades of the base colour but darker, instead of the grey desaturating effect of ambient occlusion. So I ended up chopping this map into pieces with different blending modes.
Here's one I made earlier:
Diffuse Texture
Then came the endless tweaking of the shader attributes, something I usually enjoy but when you have all the shaders with 32bit normal maps attached to them the refresh rate of the little shader swatches slows right down meaning every time adjustment takes 15 seconds for the software to become responsive again. Tedious. If anyone knows a way of turning that refresh off let me know.
Back

Front


Feet
Its fantastic to be seeing Leonard's look so close to completion (I would say done but things always change) and now I'm aching to see him move and with Luke hard at work on the rig with the majority of it done its looking promising. Leonard looks forward into a future of movement wistfully.
Leonard Paisley, realised at last.
A blog post concerning displacement maps wouldn't be the same without a glitch render so here you are:
WOOOOOH DISPLACEMENT YEAH!
Meanwhile I finally completed that brain shot for the creativity documentary and with the help of some fancy depth of field I'm really pleased with the result.


I realised I kind of skimmed over that but this blog post is already too long and there's not much more to say about it that I haven't already apart some fancy compositing. I used chromatic abberation (very sparingly), bokeh depth of field, and film grain to just elevate to that higher level of photorealism I was aiming for (though I don't think I'll ever attain due to a chronic need to stylise things). I even, after ALL THIS TIME, found a way of adding motion blur in post without motion vectors in after effects. HOW HAVE THEY BEEN HIDING THIS?! Everybody go load after effects now, with an old animation, add the time warp effect, using the pixel motion at the top of the presets, set the speed to 100, click enable motion blur, manual, and adjust the shutter angle to your heart's content. F*CKING MAGIC. I'm in genuine shock.

Nearly done now, stay with me.

Kai, I believe, has completely blown me away (a pun I didn't even notice the first time) with this cloud he's created for Kernel that will contain Leonard's precious knowledge. I've been doing some very quick lighting tests just using point lights and trying different setups with and without shadows. Much still to do but already it looks brilliant.

If you reached the end of this post then you have some idea of what a monster of a week its been, and that's only a portion of it. Forgive me if I keep the propaganda quick, my brain is frazzled and I can't be bothered to check for typos.

Pixel Propaganda

The author of A Theory of Fun writes a blog post about how narrative is not a game mechanic, and the structure of play once the narrative is removed is so exceedingly stupid that while it can make a great experience, its awful game design.

During all this sculpting Wayne Robson, autodesk Mudbox master (yes that's an actual title) released his tutorial DVDs online for free. Well worth a look for basic and advanced Mudbox type informations.

Irrational Games, currently working on Bioshock Infinite, just announced a special way of playing the game when it comes out that will enforce a degree of permanence to the player's narrative and game decisions. Intriguing.

Dear Esther comes out soon in its new shiny remake format. An interesting experiment in minimalist game design almost anyone can play and enjoy this on some level. Though I recommend doing it on a nice PC this game is gorgeous and not in a conventional sense.


A great article on the one man effort on a particular sequence in TrollHunter was published recently that is a great read for any CG generalist who has an interest in mastering every area of visual effects to an extent. Here's a breakdown of his character creation process:


Troll Hunter VFX - Ringlefinch from Rig to Render from Rune Spaans on Vimeo.

Wednesday, 1 June 2011

Pixel Prose IV

Look at the beautiful sparkle in his eye...

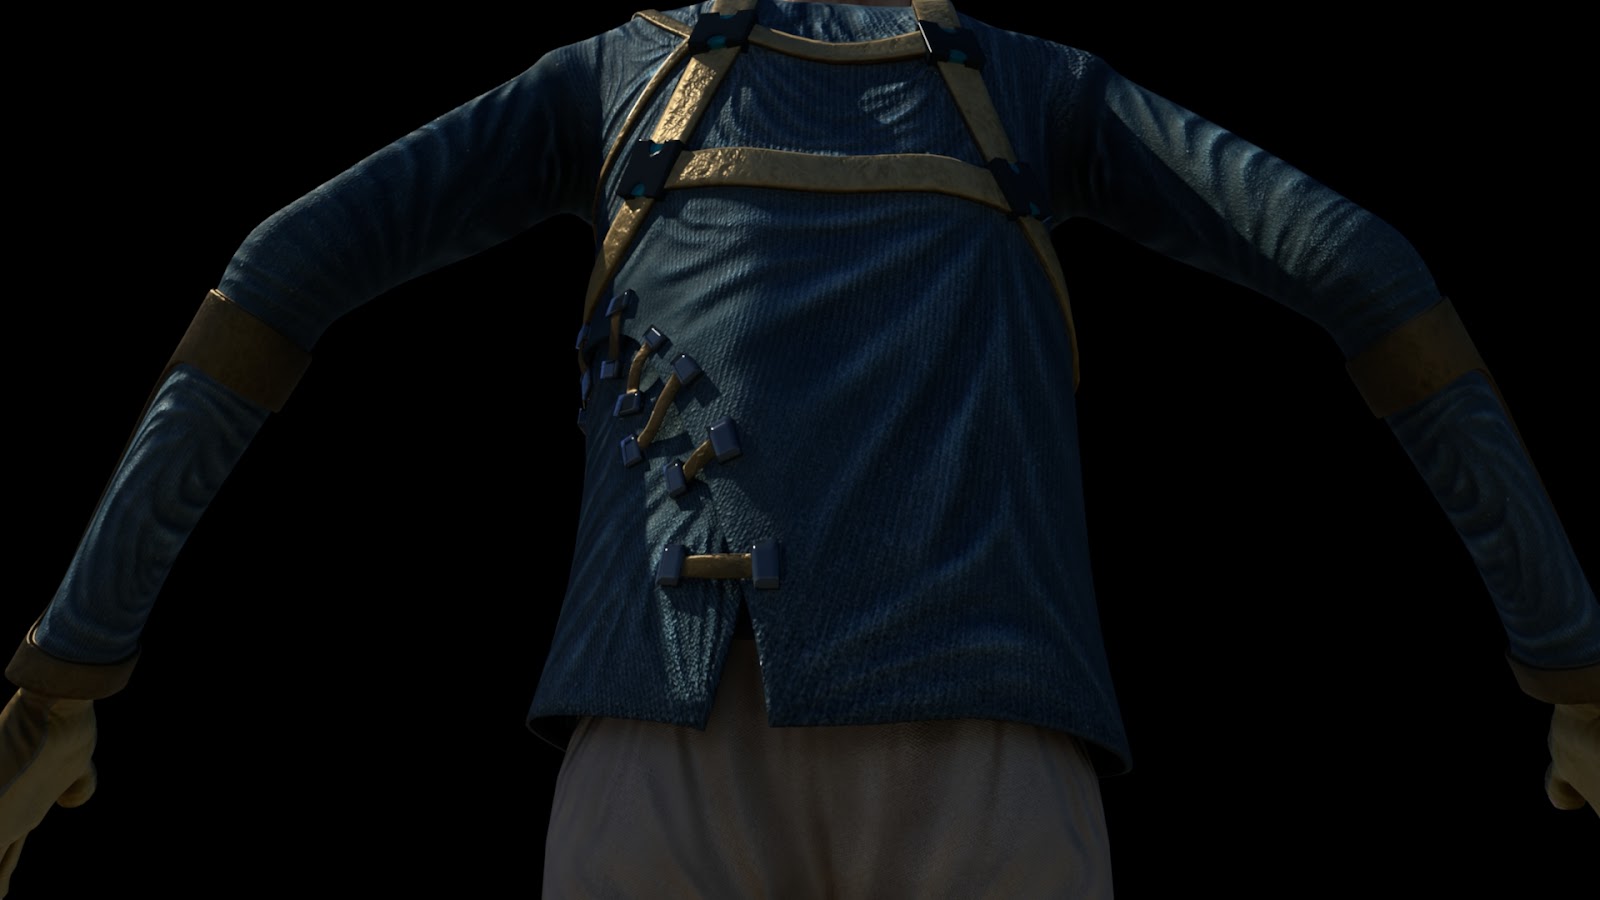
Applying the displacement map of the sculpt to the shader.
Noel is now into phase two of the negotiated brief and I've begun sculpting him in Mudbox. The transition wasn't as smooth as planned with re-scaling, normal reversing, UV unwrapping, and OBJ exporting all necessary steps to undertake before any sculpting can begin. Note to anyone attempting a similar thing: don't bother with Autodesk's cross software format of choice FBX, its a pile of crap that doesn't work properly with Mudbox's brushes, stick with OBJs.

For those not in the know, a displacement map is a texture that physically deforms the original model according to the light and dark values of the texture, this texture is generated by a sculpt you make in a piece of software like Mudbox of Zbrush. This means you can view the low poly model in the viewport but at render time a giant texture's worth of detail is tessellated at render time.

Ok that's slightly misleading. What actually happened when I applied the displacement map to the model was this:


Nice one Mudbox, how would you like it if I did that to your face?
Maya can actually handle a pretty epic amount of polygons in the viewport if you're lucky to have a half way decent graphics card. So this series of renders above this one are 2,830,320 polygons, rendered straight out of Maya. 

Unfortunately with my Wacom out of action I've been switching between dodgy tablets from the media desk, a faulty bamboo or a malfunctioning Intuos 4 when I'm in the studio. But I'm getting used to it, this is what the sculpt looks like in mudbox, I'm really trying to push the crumpled paper style wrinkles of age, so they show up nicely in the render, because some detail is bound to get lost as light is scattered through the head by the SSS shader.
Soulful Noel
I've tried to strike a balance between mirroring my brush strokes to save time, and sculpting asymmetrically to create a more organic looking character.

Pitted and Creased
Meanwhile we have a pitch rehearsal coming up, not as soon as I first thought thankfully. Hopefully I can get the concept pieces done in time and we can get a solid run through so that on the day we can break out the charm and enthusiasm. Seems like we're ditching out more ambitious gimmick which I loved as it involved the audience and therefore the pitch was unique in the same way our product was: it would be interactive. But five minutes isn't adequate time for this so we'll have to revise our strategy and either come up with something new or hope we can put together a very slick presentation.

Baker's Escape

The fourth and final literature review, from Tom Bissell excellent book Extra Lives.


Literature Review IV

Chapter 6: Braided

From Extra Lives

(2010, Pantheon Books)


This chapter features extracts of an interview within prominent independent game designer Jonathan Blow. Using Blow's words, Bissell works to construct an argument for games as an art form on its own terms.


Bissell explores the possibility of a fundamental conflict between narrative and game structure, “Games are about challenge, which frustrates the passing of time and impedes narrative progression.” (Bissell, 2010: 93) While this is a good observation about generic game design, it doesn't include the wider definitions of narrative that both Jesper Jull and Henry Jenkins have acknowledged, it very much refers to the fixed narrative as seen in the film or novel that different genres appear to draw from so much with limited success.


Then Blow raises the question of whether the art or expression in games should really be coming from the storytelling at all when other mediums may incorporate narrative but “the real art is happening else where” (2010: 94). Here the author gives the excellent example of opera, where story takes a back seat to musical performance. Later in the chapter Bissell gives us a hint as to one of the ways games serve as an expression between designer and player “Like a poem, a great platformer does not disguise the fact that it is designed” (2010: 97) but it is through a game's difficulty that Blow chooses to use as one of his methods of communication with the player: “It's difficulty is interesting because it is not arbitrarily difficult. It is meaningfully difficult, because, again, it forces you to think about what subverting time really means and does” (2010: 101). Through this back and forth between designer and author, the successes and failures of, Jonathan Blow's game Braid (2008), can be very directly evaluated, though in a mostly subjective manner.


Bissell acknowledges that Blow relates “the videogame's umbilical attachment to story to the influence of film” (2010: 94). When a medium draws so heavily from its predecessor of moving image, perhaps developers find it hard to escape this heritage, when dealing with subjects that are more representations of reality than abstractions of it. Perhaps Bissell could explore this rift between the failures of representational games and the successes of abstract games, and relating it to Juul's writing on abstraction in games.


Games often have very defined gameplay conventions, and the author does well to recognise these whilst identifying the fact that there is a difference between what some critics might refer to as a genre when it is in fact a movement, the movement in question being the 'art game' movement, whose ethos- Bissell infers, primarily follows ludologist design ideals- “They work off a few basic assumptions: games have rules, rules have meaning, and gameplay is the process by which those rules are tested and explored.” (2010: 96) Drawing parallels between artistic movements is something that few authors have done when discussing games. Relating them to established movements in other media, I feel, is a good decision that creates context for the evolution of games and fosters a better understanding of their current state of progression. “Naturalism is not the pinnacle but rather a stage of representation. With Braid, a considered impressionistic subversion of 'reality' has at last arrived” (2010: 99-100).


Overall Bissell's writing is little light on videogame terminology and theory, he makes up for this with his knowledge of literature, fine art, and film theory when discussing the topics raised throughout the chapter. While the subjects are wide ranging, they revolve around the central critique of Braid in order to cohesively hang together, and appear to fit the style of experiential game criticism well.

Pixel Propaganda 

Not much to share this week, I still want to write about LA Noire but with these literature reviews I'm aware the blog posts are verbose enough as it is.

Luckily there are a number of good pieces of LA Noire based criticism to fill that gap for me, the first of which is a hypothetical look at the gameplay enhancements a sequel could make. The second takes a critical look at the breakdown between Cole Phelps, the player, and intentionality.

Tuesday, 19 October 2010

Golden Pixels

On reaching my semicentennial (50th) blog post I am finally ready to post my modelled head.

Though not madnatory I really got into this assignment, it was the excuse I'd been long searching for to break out Mudbox, a high end sculpting peice of autodesk software. The process involves creating a basic model in Maya using the traditional polygonal stuff of translating, scaling and rotating stuff until it vaguely resembled the photographic reference Nigel had kindly shot for me:


Using the orthographic views I lined up the silhouettes of the models to the reference photos and slowly the face started to take shape. I was at this point only modelling one side of the face, which would later be mirrored.

To avoid an uncanny valley effect as much as possible I took this mirrored model and, using the reference photos, tried to match all the asymmetry in my face to create a more organic looking and authentic model. Apparently I have an innocent and evil side to my face, one side mirrored in Photoshop creates a maniacal sadist and the other a angel of purity.


Once this base model was made I imported it into Mudbox and began my first attempt at sculpting. I started with the ears as they required detail I wasn't willing to go into in Maya, then, due to the asymmetry, I did the other ear. Next I moved onto the hair, I detailed the fringe quite accurately and then did broad strokes for the tufts and strands on the head.

What Mudbox is really great for is texturing, It has the layering system of photoshop, but instead of painting over a UV snapshot after the unwrapping process you can paint textures straight onto the model using a projection brush which (ironically) projects an image or brush of your choice over the model and you paint away. You can even make separate bump or specular layers.

Not having reference photos for the back and top of the head I now have a pretty interesting hair style that involves pasting the sides of my hair all over the place.
 As you can see by this point I was crawling somewhere in the horrorific trough of the uncanny valley struggling to scramble up the otherside, doesn't help he doesn't have eye textures yet.

Here is the final turn around. I struggled with displacement and sub surface scattering shaders til 2am and it still looks like latex but it doesn'et matter too much. No motion blur either, epic fail.