The Pixel Crush

-------------------------------------------|Digital Animation & Game Criticism|-------------------------------------------

Showing posts with label mudbox. Show all posts

Saturday, 19 October 2013

Crustacean

I've recently been working on my game modelling in my spare time, with hope of relevant work next year.
The brief: make crab tank, make painterly, make low poly.

Here is the concept, cribbed from cghub courtesy of one of Naughty Dog's concept artists.


While its quite lovely, it leaves a lot of the form of the tank to the imagination, relying on a strong silhouette to convey all it needs to.  Thats fine, until you have to figure out how it might work in three dimensions, so I took the concept into Photoshop and tried to create solid shapes from each of the different parts. Also there are some crab diagrams, never know when they might be useful.
That ultimately was not as useful an exercise as I had hoped and it turnout out the tried and trusted technique of blocking out the shapes in 3D was far more effective. From this blocky outline I was able to then begin adding more detail while retaining the proportions I had laid out.

This is the high poly (lots of faces on the geometry) mesh, I made a couple of mistakes here because I was too eager to get the things into Mudbox and start roughing it up in the sculpt phase. I should have gone in and refined the mesh, some of the unsubdivided meshes were too low poly. Another thing that would have been good to take into account would have been the distribution of edge loops, as I had only added them where needed- as you do when modelling for games, but Mudbox actually works much much better with evenly spaced faces so it can subdivide more cleanly.
But I went into Mudbox instead and added pitted surfaces, scratches, gouges, it was good fun.
Unfortunately I went to town and ended up creating a 7gb sculpt that no longer ran properly on my desktop, weirdly my laptop has twice the amount of RAM and Griffith saved the day, I was able to export all the AO and Normal maps from there.


Then began the texturing, I was trying to go for a cross between the texture style of Journey and the messiness of the original concept. These two styles are slightly at odds due to the clean gradients of Journey and the dirty oils of the concept.

Pretty pleased with how it was looking at this stage:
Maya render:
I then exported the whole thing into Unity. I recently bought the marmoset skyshop in a sale and used some of its image based lighting and shading techniques to creating a little scene with the crab tank in.

With a lot of luck you can actually walk around in that scene yourself using the webplayer below. W,A,S, D to move, mouse to look around.

Edit: Yeah screw that, you can download the folder here if you want to play


Saturday, 21 January 2012

Pixel Prolific

Previously on The Pixel Crush: "next week: sculpting!"

Sculpting!

I took Leonard's newly unwrapped torso and trousers and sculpted copious amounts of folds and detail into each, slightly forsaking the original concept design in the process. The amount of folds on his otherwise quite rigid clothing gives the impression of silk draped over cardboard but I don't really care because folds are awesome.

Sculpt Front
Though Dan did point out I went overboard on his glove to the point where they looked like medical gloves rather than gardening gloves so I went back in to the sculpt, added a seam, and flattened the palms for a more practical aesthetic.

Sculpt Back
For the first time I have been experimenting with normal maps, a fancy form of bump mapping or a flat form of displacement mapping depending on your outlook on life. Or a way of adding detail to a model using a multi-coloured textures for those reading who aren't animation students/professionals. (Imagine if there were professionals other than our tutors reading these blogs...hey professionals!)

In order to generate a normal map, a technique used widely in videogames incidentally, you first need to have a high res sculpt of your base model, there are then various ways of storing the data of the surface. The 'normal' is the direction the surface of the model faces when it comes to calculating lighting, reflections etc. Tangent normals look like this for Leonard's torso and are perhaps the easiest to get to work properly as far as I've found.
Tangent Normals
Object/world based normals look like this and are exceedingly pretty in a psychedelic way.
Object Based Normals
In order to get them to work properly in Maya they had to be 32bit for some reason, something I need to look into because the texture would be much smaller in 8bit meaning (much) faster render times. This polycount wiki is a great source of information on the subject.

Taking them into Maya I played around for a few hours trying to get them to look right before realising they needed to be 32bit in order to render properly without blowing out or breaking in certain areas. I was having problems with the object based normals where the UV seams met but using the 32bit format I switched to for the tangent normals probably would've fixed this.
Here's Leonard wearing his new garments.

Later I went back and sculpted the trousers too with their fancy interleaved ankle cuff things.
Leonard in his new outfit
I even tried a normal map on the face but the way the light scatters through his skin looks SO much more beautiful when its displaced properly that the plastic looking flatness of the normal map didn't work in the excellent way it does for his clothes. Here I've applied some really simple shaders just to test the specular properties of the clothing with the normal maps applied.
Plastic Face
Its all very smooth looking so next I began texturing using a lots of maps extracted from the Mudbox sculpt including ambient occlusion, displacement, and some photographs from my tiny collection of texture reference.
Ambient Occlusion Map
Using a really simple process of painting the base colour I wanted, then layering all the maps over the top and then adding a detail layer for cloth or dirt or leather I was able to create some textures I'm quite proud of. I often used the maps to mask out things like dirt so they were only in the cracks of things where Leonard couldn't clean them so easily. Blending modes between layers became really important as the standard way of applying ambient occlusion is using multiply but to get the skin and clothing looking natural you want to shadows to be shades of the base colour but darker, instead of the grey desaturating effect of ambient occlusion. So I ended up chopping this map into pieces with different blending modes.
Here's one I made earlier:
Diffuse Texture
Then came the endless tweaking of the shader attributes, something I usually enjoy but when you have all the shaders with 32bit normal maps attached to them the refresh rate of the little shader swatches slows right down meaning every time adjustment takes 15 seconds for the software to become responsive again. Tedious. If anyone knows a way of turning that refresh off let me know.
Back

Front


Feet
Its fantastic to be seeing Leonard's look so close to completion (I would say done but things always change) and now I'm aching to see him move and with Luke hard at work on the rig with the majority of it done its looking promising. Leonard looks forward into a future of movement wistfully.
Leonard Paisley, realised at last.
A blog post concerning displacement maps wouldn't be the same without a glitch render so here you are:
WOOOOOH DISPLACEMENT YEAH!
Meanwhile I finally completed that brain shot for the creativity documentary and with the help of some fancy depth of field I'm really pleased with the result.


I realised I kind of skimmed over that but this blog post is already too long and there's not much more to say about it that I haven't already apart some fancy compositing. I used chromatic abberation (very sparingly), bokeh depth of field, and film grain to just elevate to that higher level of photorealism I was aiming for (though I don't think I'll ever attain due to a chronic need to stylise things). I even, after ALL THIS TIME, found a way of adding motion blur in post without motion vectors in after effects. HOW HAVE THEY BEEN HIDING THIS?! Everybody go load after effects now, with an old animation, add the time warp effect, using the pixel motion at the top of the presets, set the speed to 100, click enable motion blur, manual, and adjust the shutter angle to your heart's content. F*CKING MAGIC. I'm in genuine shock.

Nearly done now, stay with me.

Kai, I believe, has completely blown me away (a pun I didn't even notice the first time) with this cloud he's created for Kernel that will contain Leonard's precious knowledge. I've been doing some very quick lighting tests just using point lights and trying different setups with and without shadows. Much still to do but already it looks brilliant.

If you reached the end of this post then you have some idea of what a monster of a week its been, and that's only a portion of it. Forgive me if I keep the propaganda quick, my brain is frazzled and I can't be bothered to check for typos.

Pixel Propaganda

The author of A Theory of Fun writes a blog post about how narrative is not a game mechanic, and the structure of play once the narrative is removed is so exceedingly stupid that while it can make a great experience, its awful game design.

During all this sculpting Wayne Robson, autodesk Mudbox master (yes that's an actual title) released his tutorial DVDs online for free. Well worth a look for basic and advanced Mudbox type informations.

Irrational Games, currently working on Bioshock Infinite, just announced a special way of playing the game when it comes out that will enforce a degree of permanence to the player's narrative and game decisions. Intriguing.

Dear Esther comes out soon in its new shiny remake format. An interesting experiment in minimalist game design almost anyone can play and enjoy this on some level. Though I recommend doing it on a nice PC this game is gorgeous and not in a conventional sense.


A great article on the one man effort on a particular sequence in TrollHunter was published recently that is a great read for any CG generalist who has an interest in mastering every area of visual effects to an extent. Here's a breakdown of his character creation process:


Troll Hunter VFX - Ringlefinch from Rig to Render from Rune Spaans on Vimeo.

Saturday, 31 December 2011

Grey Matters

Too Dark
What with Kernel and a 10,000 word dissertation to write I thought I wouldn't have enough on my plate (sarcasm), so I took up Adam Warne's offer to produce a small amount of animation for a documentary he's making on the subject of the brain's capacity for creativity. Most of the documentary will consist of interviews, but for the bit where new neural pathways are forged during the conception of an idea is described a visual explanation was required to augment the crazy science.

Too Pink
I believe the shot will play out with a slow shot roving over the undulations of the brain's exterior before diving between the folds to a shot of the camera squeezing its flash-lit way deeper into the brain. Much like the stomach cam effect seen down a patient's throat, often used for surgery. Then the camera will dive further in, at this point down to a very high level of magnification, and here will be the neural pathways being forged.
Neural Pathways
This is the visual reference I need to aim for. I'm not entirely sure how to depict this yet, if all I have to show is the currents pulsing up and down a modelled set of neural pathways that shouldn't be a problem, but if the pathways have to be shown connecting I'll have to try something new. This is all subject to collaboration and revision at this point but its definitely an exciting challenge.


Mmm, Drained Brain.
I made an exceedingly basic model in Maya comprising of about 6 polygons. I jest, of course it wasn't a cube but very simple none-the-less. Then I took this into Mudbox after UV unwrapping it and subdivided it about 7 times.
Sculpt 0.75
 Here it is at about 75% completion, I often forgot to mirror the brush strokes in order to save sculpting both hemispheres separately which meant there is a certain amount of organic asymmetry in the sculpt but also some dodgy bits where the brush was mirrored even though the geometry wasn't symmetrical. I then went through the usual ordeal of exporting the thing to a displacement map and setting up the correct nodes (why does this never work quite the same way every time?).
Then I decided to start tweaking the shader with the texture applied only as a bump map in order to generate quicker test renders.
Glowy
 Too much sub surface scattering so I turned that down, a lot.
Soft
 Better but still too soft, don't you just love these work in progress comparisons? Yeah, me too.
Displaced
Then I turned the displacement on, and realised it looked nothing like the final sculpt in Mudbox, and I can't quite remember what I did to solve this but I think its because I hadn't exported the base level mesh from Mudbox to displace in Maya, and was instead using the original model. Therefore the alterations the high level sculpt had made to the low level mesh weren't there.
Shiny
Here are better specular qualities to the shader more accurately representing the spotlight flesh aesthetic I was going for.
Bulgy
Here is the correct base mesh for the displacement and all the bulges are now in the correct place.
Slimy and Inflamed
 The detail of the folds of the brain in this render was starting to get closer to the look that I wanted but due to the fact that its only really the sub surface scattering powering the shader at this point its quite dark and the redness makes the brain look kind of sore and inflamed.
Squidgy and Creamy
So with a pastelly flesh tone and some indirect lighting its starting to look much healthier but until I have a proper diffuse texture I won't be able to quite replicate the look I want which is something closer to this:
Real Brain
So veins will be a key feature which I think I can just bump map on, gloriously revolting aren't they?
and I need to figure out a way to create that gooey caramel type stuff between folds in the shader or texture. So there you have it, a nice visually stimulating post for those of us who are as sick of the words as I am from dissertationing. Pretties abound!

Some of you may have noticed how sneaky this project is as I can just reuse this sculpt in Kernel for the bulb brains, yeah, cunning. All it'll need is a simple texture replacement.

No propaganda this time but for Loz's astute response to my gamification piece.

Also, happy one hundred posts to The Pixel Crush, I think I planned to make a big deal out of it but
then forgot :/

Sunday, 12 June 2011

Paisley's Pixels II

There has been a huge bottleneck at the end of this term with deadlines, and the amount of hours we've all put in to pull it off, culminating in me spending two days in my pyjamas finishing my negotiated brief and then staying up late for another two days finalising both my animation technology presentation and our pitch project. Thrilling stuff.

Body_Diffuse
Lets do this chronologically. The negotiated brief all seemed to come together at the last minute with me finally figuring out how to make my sculpt work in Maya and then I cranked out all the textures in one day, amazingly. I took photos of my own skin, my chair material, and the material on my laptop bag to use as a resource to create the textures for Noel's face, arm, leg and overall.


Its always disturbing seeing a skin texture in its stretched and unwrapped form but here is Noel's. My work-flow started in Mudbox where I painted the texture quite roughly using photos I'd taken as stencils, this looked ok in the viewport but when I exported it to Photoshop it was a blotchy mess of collaged skin, so I took the Mudbox texture as a guide for where everything was laid out across the mesh and then re-painted it using the clone stamp tool in Photoshop, using each of the skin photos as a palette. This was a problem at first because of varying white balances and exposures in the photos so I did my best to balance them first so my texture looked cohesive.

Here's how it looked in Mudbox. I tweaked it several times to try and avoid the burnt bacon look I seemed to be achieving I also used the displacement maps to add some of the wrinkle detail into the textures themselves which always help avoid that flat look you can get in a render with lots of ambient light.

I loved adding the details like the straggly hairs on Noel's otherwise bald scalp, its how I hide my woeful understanding of proportion- by layering little details that complete the character.
Note the detail picked up in the displacement by the specular highlight along the top of Noel's head
I absolutely love this next render, it makes him look like a milky eyed wise man with a wizened face that has more stories than wrinkles.
What's that gelatinous protrusion from underneath your beard Noel? Maya fur f*ck up again?

I actually managed to attach the separate displacement nodes to individual surface shaders that all fed back into an ambient occlusion shader and achieved the following- and as ever the the model's tiniest details are revealed in glorious monochrome. I'd like to do another turn around (that's right there's a turn around coming) with an ambient occlusion render and a mental ray contour pass for the actual wireframe mesh. It'll have to wait or now. I set a shader override for the fur so it was grey at the base and white at the tip, so I'm pretty sure it's not part of the AO but just fits due to the natural gradient of grey to white as it hangs farther from its point of origin on the skin.
Shiny bounce lighting.


The arm is actually a reeeeeeally overly simple base mesh with fingers (badly) sculpted on top, but the illusion of a clenched fist would've required rigging otherwise so this was the most viable compromise I could think of, and the final look is quite nice with textures. When it comes to making a fully functional rig this will have to re-done.


I spent a little while tweaking the shader for the 'glove' and 'sock' parts of his overall but never quite achieved the look I had originally designed so that's something I'll need to re-think going forward. This near to final render wasn't what I was going for at all but by changing the colour of the refraction, reflection and diffuse to different hues created this semi-iridescent effect making it shimmer like some kind of jewellery.
Noel & his overly shiny sock/glove

I've recounted this epic tale more times than is socially acceptable but it was rather stressful and frustrating. It took Nelson (my PC), my laptop, and 6 studio computers to render out half of Noel's turn around. When you've got light bouncing from object to object, and its being taken into consideration of the light scattering through the skin, rendering can get a little complex. Oh, and there are thousands of hairs hanging off his face all bouncing light around too. Shiny, I know. So after having it rendering at home overnight I worked out it wasn't nearly enough and made my way into uni for 10am to set the studio PC's going too. At 3:30pm I took what I had and caught the bus home after waiting at the bus stop for 30 minutes, I ran and everything! I then put it all together and handed it in with 2 minutes to spare, not a complete turn around but more or less, and I was pleased with it. So here is the final thing with missing frames added:


I'll save the other projects for another post. This one's too long already.

Pixel Propaganda

One thing I didn't get quite right was Noel's eyes, too much sparkly bump mapping and incorrect cornea shapes. Georg linked me this handy illustration of correct eye anatomy and how to go about recreating it, tear ducts and all.

When E3 was full of gratuitous amounts of everything I think it was fitting that most interesting thing I saw all show was this simple interview with Irrational Games' creative director Ken Levine. He talks about relationships, specifically within- but not limited to, Bioshock Infinite.


Tuesday, 7 June 2011

Paisley's Pixels

Some advice: stock up on warm clothes and canned food, this post is looooooooooong...

Mudbox: Screwing up hard work on a computer near you.
I've finally finished exporting my sculpt from Mudbox, which has been a complete pain, because while I finished the sculpt a day or so ago the displacement maps have been playing up in Maya. So for myself and anyone else trying this I'm going to make some bullet points so I don't spend ages experimenting next time I have to do this.

Displacement maps do work, but only if you ask really nicely
  • You can export using both subdivision and raycasting methods, subdivision is faster but limited to one object, raycasting uses more memory and is less stable and has more settings: so more room for error
  • There are options to smooth target and source meshes and smooth UVs. These are all necessary for a correct displacement apparently, otherwise the maps exports with un-smoothed values.
  • Stick with floating point EXR's, any 32bit format should work but this one ensures compatability and quality.
  • Make sure you export the base level meshes from your sculpt back into Maya as they probably changed significantly from the meshes you started with.
  • When you connect the displacement map to the displacement node of the shading group make sure you then go to that objects displacement attribute and click calculate bounding box so it can figure out how much displacement is going to take place.
  • If you're doing this with a mental ray shader you make have some errors so do it with a lambert or something, and then when the bounding box is calculated you can apply the mental ray shader back to the object.
  • Sometimes subdividing the base mesh with the displacement on top improves the appearance of the tessellation.

Yes, he even has hair. Yes its shiny as f*ck

I have literally been sat in my room in my pyjamas for two days finishing the sculpt and trying to figure this crap out and, while not healthy, I actually feel like it might all be finished in time for the deadline, and to a much higher standard than I hoped for halfway through this project. It's probably not going to be as perfect as I initially imagined, but its encouragingly close. All that's left to do is paint textures which, apart from the face, should be fairly quick.

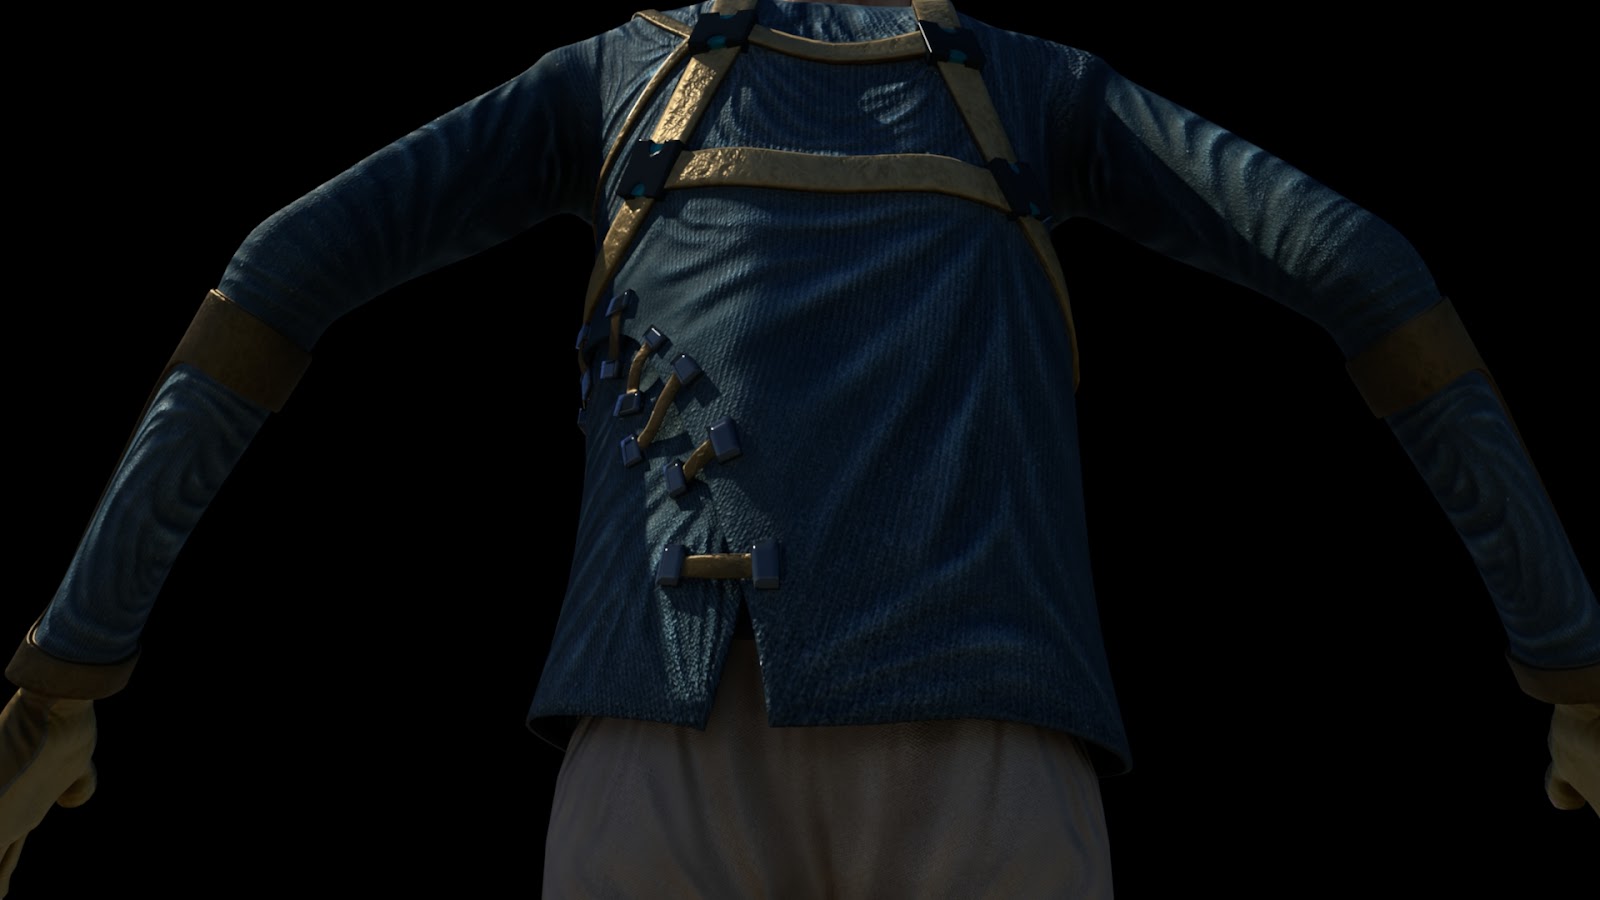
Noel Paisley Ladies & Gentlemen
Gauntlet close up

Sock (couldn't think of an epic equivalent) close up
Ignore the tip of his beard geometry protruding from under the hair, I haven't yet figured out how to cover it in hair.

Did I get a bit render happy? Yes but I that it is both justified and well earned.


When sculpting was too much I sheltered within the familiar confines of Photoshop and tried to get something presentable in terms of concept art for the pitch project. Teaser:

Thomas Farriner Makes His Escape
Amazing what blending modes and a couple of textures can hide ;)

The Animated Analysis that tanked in terms of marks (though not as much as my dissertation proposal) but which I'm quite proud of (though not so much now I'm told its not worth an academic damn).


Analysis of an Animated Work:
Immersion & Emergent Storytelling in Far Cry 2 (Ubisoft, 2008)


Most people would classify Far Cry 2 as part of the open world, first person shooter genre (FPS). This is a rare hybridisation, so uncommon in fact that the sub-genre of the 'corridor shooter' has become ubiquitous when describing most FPS games, as many of these games take place in environments where the player is funnelled down a series of corridors in a restrictively linear fashion; both in terms of narrative structure and level design. This is perhaps where Far Cry 2 innovates the most but also where it stumbles, most likely due to the massive scope of the game world that is being represented in game for the player.

Immersion can often share a close relationship with the technology of a game. When the player needs to be sold on the illusion the game is offering in order for them to suspend their disbelief, their sensory connection to the game is one of the most important elements. Hence the emphasis on graphical fidelity, sound design, and the perpetual existence of the game world that Murray hints at in her writing on immersion (Murray , 1999: 105). There are a number of ways that Far Cry 2 strives to maintain perpetual existence of its world that work to enhance player immersion.

There are no loading screens, no pauses while the player is forced to wait, in an open world game this a difficult but necessary technological achievement. Jesper Juul talks about the way a game has fictional time and a play time where time in the game world is fictional time, whilst play time is time as the player experiences it. He gives the example of the loading screens in Half Life maintaining fictional time by pausing to stream data, but disrupting play time (Juul, 2005: 143). Far Cry 2's lack of load screens (except for when the player boots the game before playing) allows the fictional time and play time to remain in sync. In this way suspension of disbelief can be sustained, and the player is immersed for longer stretches of time.

Far Cry 2 uses a safe house system where the player can 'save' their game by sleeping on a camp bed. Save games in Far Cry 2 allow the player to rest his character for a chosen amount of time using a watch on the character's wrist, this is the only example of fictional time breaking away from play time and it is portrayed by a time lapse of the world outside the safe house. As the sun lowers in the sky the weather changes, non-player characters (NPC's) whiz around, and the player is shown how the game world is in perpetual existence. It continues to exist without him or her, which creates a believability in the procedural nature of the game world and it's various systems.

The animation system in Far Cry 2 plays a big part in the player's immersion, the game shuns the use of the cut scene, a technique ripped straight from the frames of its moving image sibling, film. Instead the player is fixed to the first person perspective of their character continuously . This means that every action the player performs is done using their own digital hands, without the use of an obtrusive user interface or heads-up-display. For example Far Cry 2 allows the player to navigate its 50km open world (an unnamed African country in the middle of civil war) using a map, which the player carries in the hand and can examine at any time. When the player finds a vehicle, they enter it without leaving the first person perspective, with animations provided for every action. The same goes for firing, reloading, and unjamming weapons, repairing vehicles or swimming.

Far Cry 2 also has a unique approach to first aid. While it borrows the rather tired convention of the health pack to heal a players wounds, when the player is critically wounded, they must retreat from battle and tend to their ailment. This cues a brief animation of the player reaching down and say, pulling some shrapnel from a leg, or fixing a dislocated knee joint. This insistence on a first person perspective, perpetual world existence, and 1:1 fictional and play time all follow an uncompromising design ethos that match the brutal nature of the games themes of idealism and greed. In this way Far Cry 2 forms a communication between designer and player though its mechanics of play, a design methodology that is described in Extra Lives and advocated by independent developer Jonathan Blow (Bissell, 2010: 93)

This unrelenting immersion can occasionally hurt the player's experience, while games have evolved beyond placing 'fun' as their only purpose, this does not mean a player is going to relish the frustration of having a game's systems punish him/her time and again. Whilst getting to a mission objective on the map, the player can begin to resent the systems that embedded them so firmly in the game world when they have to run for miles in real time, only to be gunned down in the chaos of the enemy AI and fire propagation system.

While these systems can work against the player's enjoyment of the game at times, they are what create the potential for the player-centric emergent narrative that Henry Jenkins discusses in his Narrative Architecture essay (Jenkins, 2004) and truly explore the medium's narrative potential. This approach to meaningful story relies on the 'buddy system', the characters that the player meets can rescue the player when they are failing in combat, in this way the immersion of the player is saved from being broken by a fail state or load screen after death. While the missions remain fixed, the certain elements are interchangeable, and players can make choices that allow the narrative to branch. In this way Murray's “procedural authorship” (Murray, 1999) is at last put to use as elements of the story are directed by the author's hand (the buddies) and the player takes those elements and assembles them through choices and gameplay, forging a personal and unique emergent narrative. This was taken even further by one critic who documented a 'perma-death' (a self enforced rule where once the player dies, the game is over) play through of the game and annotated the screen shots he took with anecdotes of his own emergent experiences (Abraham, 2009). This is one example of the best that Far Cry 2 can be, and a logical extension of its uncompromising nature.

Bibliography
Murray, Janet (1999) Hamlet On The Holodeck The MIT Press
Juul, Jesper (2005) Half Real The MIT Press
Jenkins, Henry (2004) 'Game Design as Narrative Architecture' in: First Person: New Media Story, Performance and Game The MIT Press
Bissell, Tom (2010) Extra Lives Pantheon Books
Websites
Abraham, Ben (2009) Permanent Death - The Complete Saga http://drgamelove.blogspot.com/search/label/Permanent%20Death 27th April, 2011
Games
Far Cry 2 (2008) Developed by Ubisoft Montreal [Sony Playstation 3], Ubisoft

 Pixel Propaganda

Not the must cutting edge article on story in games, but its still intriguing to ascertain the state of narrative among developers. There are two other parts also so worth reading if this piques you interest.

A wonderfully written review of LA Noire that interprets the games world and characters in a wholly original manner.

Why sometimes I should learn to shut up about my passions and obsessions, and why not shutting is up is so important.